Many of you will have seen me post this card recently on a post showcasing my Winter Stamp Camp cards.

Instructions -
Take a piece of card measuring 7 1/2" x 4 1/4". Lay this landscape on your scoreboard or SU trimmer. Below I will show you on the trimmer.

Measure across the top to 2 1/2" then score down from top to bottom


I was fortunate to receive a lot of comments on the social media posts featuring the stamp camp cards and have been asked about this fold in particular. I promised to show how easy it is, so here we go!
First, let me point out, you can make this card any size that you would like but I've made it to fit a standard English sized C6 envelope which are available from Stampin' Up!. In other countries such as the US, the sizes have different names but just know that this should work in a Stampin' Up! envelope. If you decide to make a larger card, it is very likely that the side flaps on the fold will get bent in the mail. So, for me, this was the optimum size. For this tutorial I will be using inches (simply because of the number of US demos asking me for information), I will endeavour to add metric measurements later. UK readers please see note at foot of post.Instructions -
Take a piece of card measuring 7 1/2" x 4 1/4". Lay this landscape on your scoreboard or SU trimmer. Below I will show you on the trimmer.

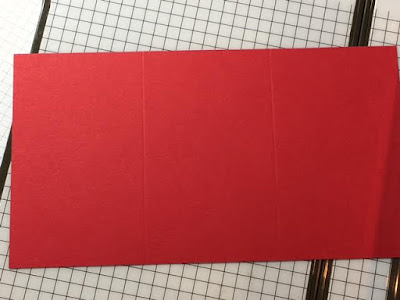
Measure across the top to 2 1/2" then score down from top to bottom

Slide along to 5" and score down again from top to bottom. Your card will look like this, each panel the same size -

Fold on the score lines

Now you are going to turn your card slightly on the trimmer/scoreboard to enable you to score the left panel from top left corner to bottom right

Your card should look like this

Now score the right hand panel top left to bottom right, in the same way. Your card should look like this with score lines on the two outer panels-

Fold the left panel over the centre panel, then along the diagonal score line fold back, as in this picture

Open out flat. Fold the right panel over the centre panel then, along the diagonal score line, fold back

So, that's all your base card done. When folded together it will look like this (without my fingers!)

You can decorate and embellish as you wish. I used Very Vanilla cardstock and the Cable Knit Embossing Folder.
To CASE what I've done you will need -
2 pieces of Very Vanilla card measuring 2 1/4" x 4" - these will be for the centre back (to write your greeting) and centre front panels (you can stamp on this). They do not get embossed.
 |
| Inside the card |
 |
| Back of card |
You also need -
3 pieces of Very Vanilla measuring 2 1/4" x 4"
These you will emboss. Once you emboss take one piece and cut it diagonally, top right to bottom left -

These get stuck to the front of the card under the flaps, as shown...

The other 2 pieces to be cut top left to bottom right and glued as shown below (NOTE: I need to cut mine a little neater so have not stuck them on at this point but put them in place so that you can see where they go - you'll need to forgive me on this one, it's evening on New Years Eve and I need to finish and get this posted for all those of you who have asked).

***UK readers - if you make your card 7 1/2" x 4 1/8" you'll get 2 cards from each A4 sheet! DSP will then need to measure 2 1/2" x 3 7/8".
I do hope that you've found these instructions easy to follow ant that you'll try out this fold.
I'm off to be with my family now but wish you all A VERY HAPPY NEW YEAR!!!

This site is my sole responsibility as an Independent Demonstrator and is not endorsed by Stampin' Up! Images copyright 1990 - present day Stampin' Up!


4 comments
Oh, thank you so much for these e great instructions. I'll be making Valentine card for my stamp club's shoebox swap. This will be really special.
ReplyDeleteYou are very welcome Kathy. Have fun at stamp club!
DeleteThank you for the instructions. I will be making these with my granddaughter. Always fun to share with family & friends.
ReplyDeleteYou're welcome! Have fun with it! :)
Delete